How to Remove Search Protect by Spigot
 Search Protection by Spigot is classified as a potentially unwanted program. This application is designed to protect its bundled programs and make sure they remain installed or unchanged by other third party programs. It creates registry entry for the current user which will allow the program to automatically start each time it is rebooted.
Once it gets inside your PC, Search Protection will change your web browser's settings, making you to visit search engines and websites associated with it over and over again. And if you want to revert to their default settings, this program will not allow you to perform these changes. This application causes the pop-ups and various types of advertisements. If you go to the Windows Task Manager, you should see two “SearchProtection.exe” processes running.
Search Protection by Spigot may be a reason of various system performance issues on the affected computer. It can slow down your internet browsers and also may cause redirected searches or failed keyword searches.
Search Protection is typically bundled when you install freeware or shareware (video recording/streaming, download-managers or PDF creators etc.)
It is very important to pay attention to additional checkboxes during the installation to avoid installing of unwanted applications or toolbars.
Search Protection Automatic Removal Instructions
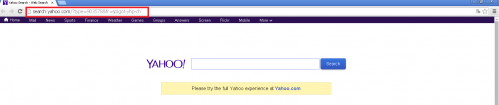
To remove search protection by spigot (yahoo.com) from your computer, follow these steps:
1. Download the Web Companion
2. Launch the Web Companion installer "webcompanioninstaller.exe" by double-clicking on the setup file and follow the instructions to install the software.
3. During the installation, Web Companion will remove Search protection by Spigot and prompt you to setup your desired home page and default search engine.
Search protection Manual Removal Instructions*
If the automatic removal via Web Companion failed, we recommend to follow these steps:
1. Terminate malicious process(es) (How to End a Process With the Task Manager):
searchprotection.exe
SearchSettings.exe
random.exe 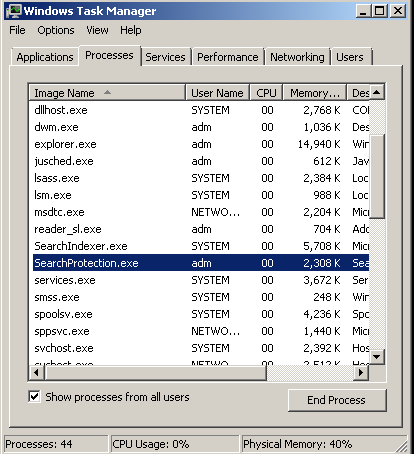
2. Uninstall Search Protect
For Windows 7:
- Click the "Start" button and select "Control Panel"
- Click "Uninstall a Program" option found under the "Programs" category
- Select the program with the name "Search Protection"
- Click "Remove"
For Windows Vista
- Close all open Web browsers
- From the "Start" menu in Windows, select "Control Panel"
- Under the "Programs" icon, select "Uninstall a program"
- Select the program with the name "Search Protection"
- Click "Uninstall" and then "Continue" to remove the Toolbar
For Windows XP
- From the "Start" menu in Windows, select "Control Panel"
- Click on "Add/Remove Programs".
- Select the program with the name "Search Protection"
- Click "Change/Remove"
For Windows 8
- Go to Charm bar (key +C) and then” Settings”, then "Control Panel"
- Choose “Programs and Features”
- Choose the Search Protection and delete it ![]()
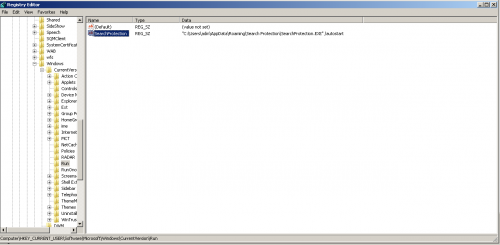
3. Delete the following files/entries created by the Search Protect
Computer\HKEY_CURRENT_USER\Software\Microsoft\Windows’CurrentVersion\Run
C:\Users\adm\AppData\Roaming\Searchprotection
*Manual removal may cause unexpected system behavior and should be performed at your own risk.
4. Finally, it is recommended to always keep your antivirus up-to-date and perform weekly full scans.
Also, we advise you to do a custom AV scan of any application downloaded from the internet before you proceed with its installation.
• If you do not currently have an antivirus installed, please click here to download Ad-Aware Free Antivirus+ and follow the installation instructions from Ad-Aware User Guide (‘Installation and Uninstallation’ -> ‘Ad-Aware Install’ section).
• Perform a full scan of your PC with Ad-Aware (following Ad-Aware User guide: ‘Scanning System’ -> ‘Running a scan’ section).
Facebook Comments Box
YOU SHOULD KNOW...
CATEGORIES
- Beta Testing (29)
- Comment (9)
- Definition File Updates (2)
- Developer Comments (15)
- Everyday Life at Lavasoft (92)
- How to (17)
- Industry and Security News (558)
- Lavasoft Products (141)
- Law Enforcement and Legal Action (49)
- News about Lavasoft (109)
- Phishing (1)
- Researcher Comments (39)
- Riff Raff (25)
- Rogues (76)
- Security Alert (93)
- Security Alerts (72)
- Security Tips (260)
- Website News (11)


