How to Remove Movies! Toolbar
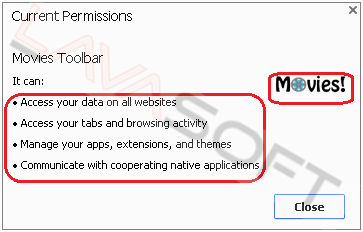
 Movies! Toolbar distributed by Bandoo Media Inc., describes itself as a convenient tool to make your browsing more enjoyable. And to provide such a feature, it requires the following permissions on your PC:
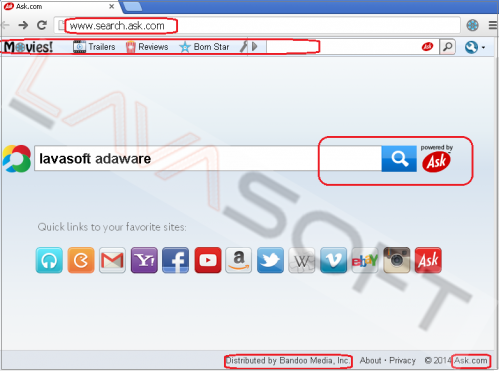
Also, it modifies your default search engine to ask.com, and changes your homepage to search.ask.com. So once activated, you are forced to use the ask.com services every time you go to internet:
Here are a few more facts we would like to pay your attention at about Movies! Toolbar:
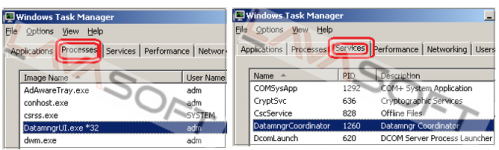
• With every Windows start, DatamngrCoordinator.exe service and DatamngrUI.exe process launch automatically that may slow down boot time of your machine. The Datamngr Coordinator service is marked as an interactive service. And if your system is configured not to allow interactive services (it is a default setting starting Windows Vista OS), this service may not function properly.
• Another process of Movies! Toolbar launches every time you open Google Chrome: 
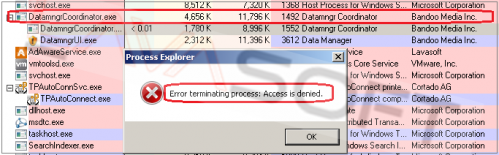
• All these processes and services mentioned above slow down your PC performance overall. And you may not be able to manually stop Datamgr process, for example, as the access can be denied:
• Using driver ‘setmgrc1.cfg’ Movies! Toolbar controls operations with a system registry by installing the registry notifier.
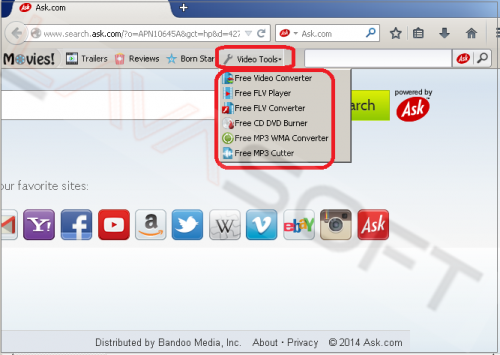
• Free applications that this toolbar offers under its ‘Video Tools’ button, are detected by some antivirus companies as suspicious programs.
• Some websites offered by this toolbar, may track your physical location, as well as send stats to different servers.
![]()
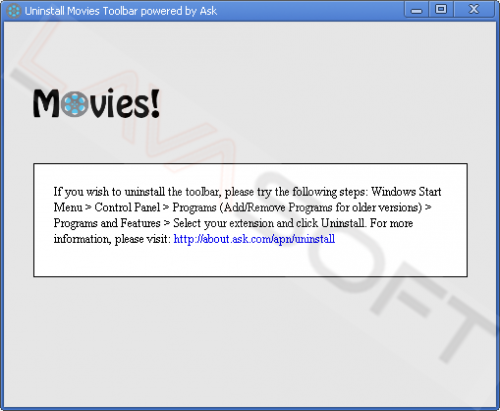
• Some versions of Movies! Toolbar have an option ‘Uninstall Movies Toolbar’ that is not an actual uninstall button, but short instructions how to remove any program from Control Panel (such a method won’t help you to remove all the traces of this program though).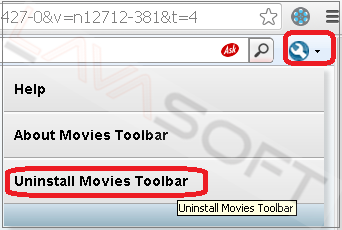
If you want to remove Movies! Toolbar from your PC, please find below uninstallation steps.
Note. This is a self-help guide. Use it at your own risk. This article is provided "as is" and to be used for information purposes.
1. Before you start, please make sure you are logged as a system administrator. Also, please save a copy of your important documents/files on an external hard drive.
2. From your desktop, click on Windows Start button and choose Control Panel option (Windows 8 users: right-click on ‘Windows Start’ ![]() icon (by default, it is located in the left bottom corner of your screen), and choose Control Panel from the context menu):
icon (by default, it is located in the left bottom corner of your screen), and choose Control Panel from the context menu):
- Click ‘Programs and Features’ (Windows Vista, 7 and 8)/‘Add or Remove Programs’ (Windows XP).
- Find ‘Movies! Toolbar’ in the list, right-click on it and choose ‘Uninstall’.
- Note. There may be 3 Movies! Toolbars for Internet Explorer, Mozilla Firefox and Google Chrome (Publisher: IAC Search and Media) here; so please uninstall all 3 items. On the last step, the uninstall wizard should offer a link with steps to change your browser search settings from search.ask.com. Please click on ‘Close’ in this window, you will find below more detailed instructions how to clean your browsers.
- Restart your PC
3. Now please clean up your browser:
Mozilla Firefox
- Click on the Menu button ![]() in the right upper corner of Firefox window (older versions of browser: click on the orange ‘Firefox’ logo in the upper left corner) -> find Add-ons section -> Check ‘Extensions’ and ‘Plugins’ tabs, and if you find Movies! Toolbar extension here, please click on ‘Remove’ button.
in the right upper corner of Firefox window (older versions of browser: click on the orange ‘Firefox’ logo in the upper left corner) -> find Add-ons section -> Check ‘Extensions’ and ‘Plugins’ tabs, and if you find Movies! Toolbar extension here, please click on ‘Remove’ button.
- Again click on the Menu button -> Options :
• In the General tab ‘Home Page’ field, highlight and delete http://www.search.ask.com... address using context right-click menu. Once done, you can type here a new address of your preferred home page in ‘http://…’ format.
• In the Security tab make sure that all the 3 options ‘Warn me when sites try to install add-ons’, ‘Block reported attack sites’ and ‘Block reported web forgeries’ are checked.
• In the main Firefox window, click on a small triangle in the ‘Search Engines’ field (right upper corner) ![]() , and choose ‘Manage Search Engines…’ option. Highlight all the unwanted search engines and click on ‘Remove’ button.
, and choose ‘Manage Search Engines…’ option. Highlight all the unwanted search engines and click on ‘Remove’ button.
• Restart Firefox.
Google Chrome
- Type chrome://settings in the Chrome address bar and press ‘Enter’ to open Chrome Settings menu;
- In the ‘Extensions’ tab, if you find Movies! Toolbar, click on a trash can icon next to this extension. Please also check if there are other suspicious items that you don’t use or you don’t know where they came from, and remove these as well.
- In the ‘Settings’ tab find ‘On Startup’ section -> in the ‘Open a specific page or set of pages.’ option, click on the ‘Set pages’ link -> if you find ‘search.ask.com’ here, hover your mouse to this line for a ‘Delete’ option to appear, and click ‘x’ to remove this page from startup;
- In the ‘Appearance’ section, when the ‘Show Home button’ is checked, if you see ‘search.ask.com’ link, please click on ‘Change’ and remove it from your browser;
- In the ‘Search’ section, click on ‘Manage search engines…’ -> hover your mouse cursor to any search engine for the ‘Make default’ and ‘Delete’ menu to appear. You can delete all the unnecessary search engines here, and make default your desired one (note. While an engine is set to ‘Default’, you are unable to delete it. Therefore, firstly choose a new default search tool. Once done, you will be able to remove old default item.):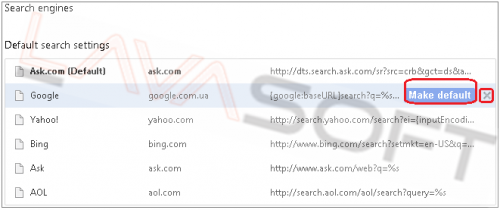
- Click on ‘Show advanced settings…’ link for a new settings menu to appear -> in the ‘Privacy’ section please make sure that ‘Enable phishing and malware protection’ box is checked;
- Restart Google Chrome.
Internet Explorer
- When IE window is opened, press Alt+x keys on your keyboard to open Tools menu -> Manage Add-ons -> in the ‘Toolbars and Extensions’ section if you have ‘Movies Toolbar’ add-on, highlight it and click on ‘Disable’/‘Delete’ button;
- Again open Tools menu -> Internet Options -> General Tab -> Home page section: if you see unwanted link here, highlight and delete using context right-click menu -> type a new web address you want to set up as your home page, and click ‘Apply’. You can also set other custom settings of your startup page display in the ‘Startup’ section (to start with your last session, for example):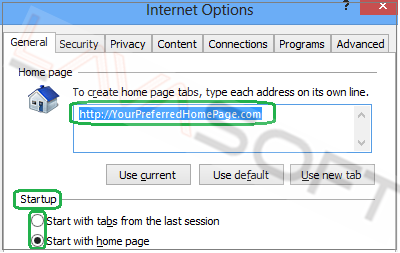
- Restart Internet Explorer.
4. Please make sure that hidden files in your Windows Explorer are visible: Start –> Control Panel (Appearance and Personalization) –> Folder Options –> ‘View’ tab –> find ‘Hidden files and folders’ and choose an option ‘Show hidden files, folders, and drives’ -> ‘Apply’ -> ‘OK’.
5. Follow this path - C:\Users\YOUR_USER_NAME\AppData\Local\Temp (XP users: C:\Documents and Settings\test\Local Settings\Temp) -> highlight all the files/folders here -> press ‘Shift’+’Delete’ and click ‘Yes’ to completely clean this folder (note. If you receive messages that some files cannot be removed, just skip the file in question).
6. Please find the directories below and make sure that all the Movies Toolbar files/folders are removed (you may not find some of the components, it is normal):
C:\Program Files (x86)\Movies Toolbar
C:\ProgramData\Datamngr
C:\Users\YOUR_USER_NAME\AppData\Local\ilividmoviestoolbar20
C:\Users\YOUR_USER_NAME\AppData\LocalLow\DataMngr
C:\Users\YOUR_USER_NAME\AppData\LocalLow\ilividmoviestoolbar20
C:\Users\YOUR_USER_NAME\AppData\LocalLow\searchresultstb
C:\Users\YOUR_USER_NAME\AppData\LocalLow\Microsoft\CryptnetUrlCache\MetaData\7B8944BA8AD0EFDF0E01A43EF62BECD0_B260506C25B5617AB5972F1DE58B4B0E
C:\Users\YOUR_USER_NAME\AppData\LocalLow\Microsoft\CryptnetUrlCache\MetaData\57C8EDB95DF3F0AD4EE2DC2B8CFD4157
C:\Users\YOUR_USER_NAME\AppData\LocalLow\Microsoft\CryptnetUrlCache\Content\7D266D9E1E69FA1EEFB9699B009B34C8_0A9BFDD75B598C2110CBF610C078E6E6
7. Now please remove Movies Toolbar traces from your registry. Before you start, please make sure you understand how important this part of your PC is. You cannot restore data from here once you delete something (‘Ctrl+Z’ never works in Registry Editor). And if you delete an incorrect component by mistake, it may damage your OS and make it unusable.
• To open the Registry, press ‘Win+R’ keys on your keyboard -> in the opened window type regedit and press ‘Enter’.
• Highlight main registry section called ‘Computer’ -> press Ctrl+F keys on your keyboard -> make sure Keys, Values, Data boxes in the ‘Find’ window are checked -> type Movies Toolbar in the search field and click OK. Search results will highlight a key/value/data that contains Movies Toolbar components. If you find the exact name of program you want to remove, right click on the element in question and choose ‘Delete’ from the context menu. If it’s a value/data, right click on the value and choose ‘Modify’, then highlight harmful data and press ‘Delete’ key on your keyboard.
• Use F3 key to continue the search and to find all the necessary files.
• Repeat the above procedure with the following words: datamngr, ilividmoviestoolbar, ask.com, bitguard.exe, bprotect.exe, bpsvc.exe, browserdefender.exe, browserprotect.exe, browsersafeguard.exe, dprotectsvc.exe, jumpflip, protectedsearch.exe, searchinstaller.exe, searchprotection.exe, searchprotector.exe, searchsettings.exe, searchsettings64.exe, snapdo.exe, stinst32.exe, stinst64.exe, umbrella.exe, untiljumpflip.exe, volaro, vonteera, websteroids.exe, websteroidsservice.exe
• Exit the registry editor.
8. Finally, please install Ad-Aware to make sure you don’t have any infections on your machine:
• Click here to download Ad-Aware Free Antivirus+, and follow installation instructions from Ad-Aware User Guide (‘Installation and Uninstallation’ -> ‘Ad-Aware Install’ section).
• Perform a full scan of your PC with Ad-Aware (following Ad-Aware User guide: ‘Scanning System’ -> ‘Running a scan’ section).
• Restart your PC.
Lastly, it is recommended to always keep your antivirus program up-to-date with a real-time protection turned on, and perform weekly full scans to stay protected at all times.
Facebook Comments Box
YOU SHOULD KNOW...
CATEGORIES
- Beta Testing (29)
- Comment (9)
- Definition File Updates (2)
- Developer Comments (15)
- Everyday Life at Lavasoft (92)
- How to (17)
- Industry and Security News (558)
- Lavasoft Products (141)
- Law Enforcement and Legal Action (49)
- News about Lavasoft (109)
- Phishing (1)
- Researcher Comments (39)
- Riff Raff (25)
- Rogues (76)
- Security Alert (93)
- Security Alerts (72)
- Security Tips (260)
- Website News (11)


