How To Remove Binkiland
 Binkiland is a program that modifies browser homepages to its own. The page offers a general search, bookmarked links as well as adverts about the need to repair your PC, even when that isn’t the case. In the future, you can protect yourself from browser hijackers with Web Companion.
When you try to change your browser homepage, it constantly redirects back to the Binkiland website unless you completely uninstall it.
Besides browser homepage modifications, it collects data a user may consider to be private, such as information about your internet browsing habits. This application also may affect browser performance as it takes up additional processing power if installed.
Binkiland is commonly bundled with third party applications (as seen in the example below).
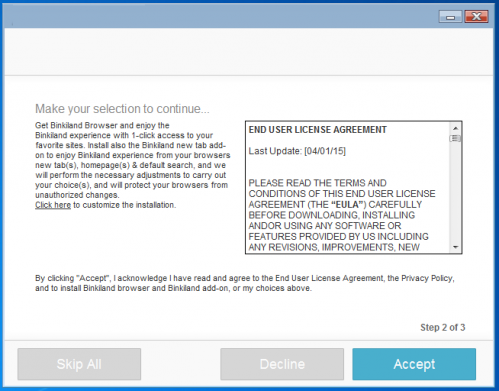
Binkiland Installation
You can see from the image above that it is easy to miss the offer to install this application (as the Accept button may be considered misleading—it seems as it’s for the main application opposed to Binkiland) and just install it without realizing. The removal process of Binkiland is a bit tedious, which is one of the main reason it makes it a potentially unwanted application. You should always be careful when installing an application.
To avoid these kinds of issues in the future, it’s always best to do some research online and read reviews about an application before installing. Where you are given the option to choose a custom or advanced installation, it is often possible to opt out of the bundled application install.
 Binkiland homepage on Google Chrome
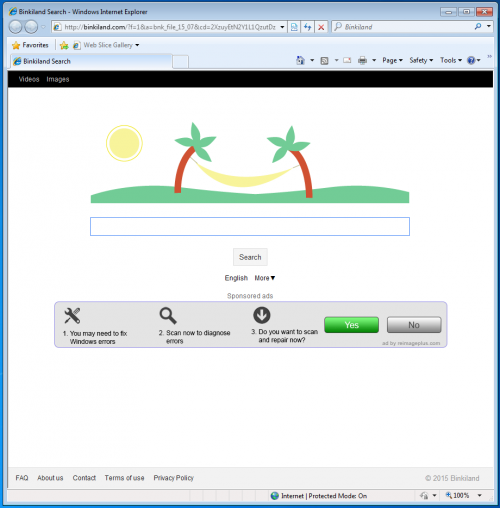 Binkiland homepage on Internet Explorer
Removal Instructions
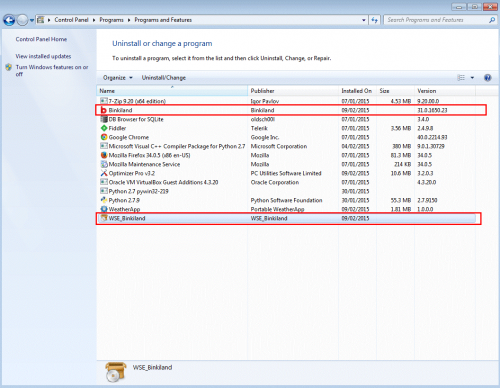
1. Click Start (then Settings, for Windows XP users) -> Control Panel -> Programs (or Add/Remove Programs if using Windows XP) -> Uninstall a Program.
2. Once there, look for Binkiland and WSE Binkiland -> select Uninstall/Change/Remove.
3. Click OK to save the changes. Follow any instructions that may prompt to remove this program.
To completely remove Binkiland.com, you need to stop its malignant processes, delete malware files and registry keys. It is always important to back up your important data before taking these types of actions.
4. Stop all Binkiland.com processes in Windows Task Manager
• Windows XP: Open Windows Task Manager -> Go to Processes -> Right-click on processes associated with the virus, click End Process
• Windows Vista/7/8: Right-click Task bar -> click Task Manager -> Go to Processes
-> Right-click on processes associated with the virus, click End Process
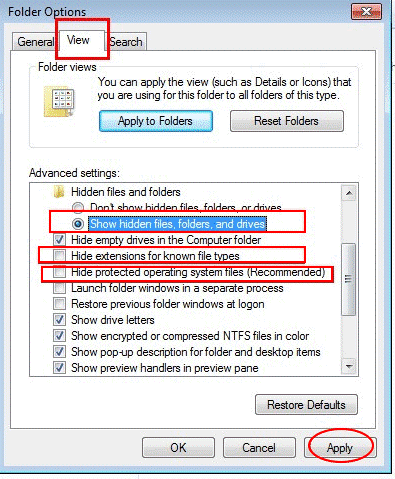
5. Show hidden files in Folder Options
- Windows XP:
• Click Start icon -> Control Panel -> go to Appearance and Personalization -> go to Folder Options and click Show Hidden files and folders -> select Show hidden files, folders, or drives
• Remove checkmark from Hide extensions for known file types
• Remove checkmark from Hide protected operating system files (Recommended)
• Click Apply, then Click OK
- Windows 7/Vista:
• Open Libraries -> go to Tools under Folder Options -> click Show Hidden Files or Folders -> select Show hidden files, folders, or drives
• Remove checkmark from Hide extensions for known file types
• Remove checkmark from Hide protected operating system files (Recommended)
• Click Apply, then Click OK
- Windows 8:
• Click on Windows Explorer -> go to View tab -> checkmark Hidden Items box
6. Delete files associated with Binkiland.com
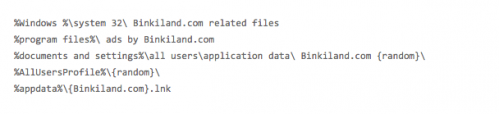
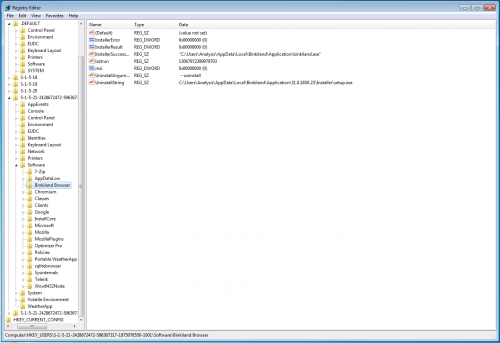
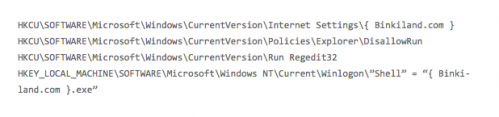
7. Click Windows key + R on your keyboard to open Run -> type Regedit -> click OK to open Registry editor -> Locate registry entries associated with Binkiland.com -> Terminate the registries created by Binkiland.com
- Next, disable/remove Binkiland from your browsers:
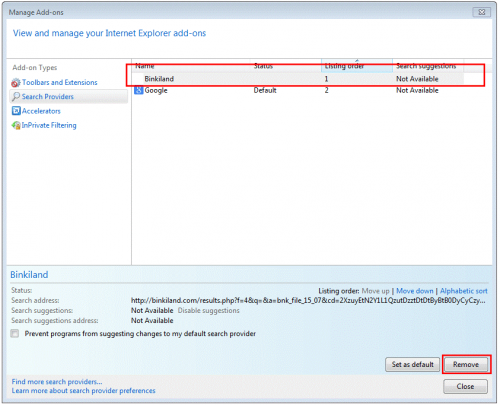
Internet Explorer
1. Open Internet Explorer -> Click Tools -> Click Manage Add-ons -> Search Providers. Once there, look for Binkiland or similar entries and click Remove or Disable (depending on the version of OS/browser version)
Mozilla Firefox
1. Open Mozilla Firefox -> type about:config in the browser address bar -> press Enter.
2. Locate browser.search.defaultenginename from the list, replace its value with your favourite search engine and click Save.
3. If your new tab opens with an unwanted page, locate browser.newtab.url and replace it with about:newtab.
4. Close and Restart the browser to let the changes take effect.
If you continue to have problems with removal of the Binkiland after following these instructions, reset your Mozilla Firefox settings to default.
How to reset Firefox:
Open Mozilla Firefox, click Firefox menu (3 bar icon, top right corner) -> click ‘Open Help Menu’ icon (a circle with a ? inside) -> select ‘Troubleshooting Information’ -> click ‘Reset Firefox’ -> click ‘Reset Firefox’ in the opened window to confirm the selection. Firefox will close itself and will revert to its default settings.
Google Chrome
Open Google Chrome -> click the Chrome menu button (3 bar icon, top right corner) -> Settings -> Search -> Manage Search Engines
If you are still encountering problems with Binkiland, reset your Google Chrome browser: Click on Customize icon (will be either a wrench or 3 bar icon) -> Tools -> Extensions -> Settings (at left corner of screen) -> Scroll to bottom of screen, click Show advanced settings…-> Reset Browser settings (located at bottom of window)
Finally, it is recommended to always keep your antivirus up-to-date and perform weekly full scans.
Also, we advise you to do a custom AV scan of any application downloaded from the Internet before you proceed with its installation.
If you do not have an antivirus, click here to download Ad-Aware Free Antivirus+.
Facebook Comments Box
YOU SHOULD KNOW...
CATEGORIES
- Beta Testing (29)
- Comment (9)
- Definition File Updates (2)
- Developer Comments (15)
- Everyday Life at Lavasoft (92)
- How to (17)
- Industry and Security News (558)
- Lavasoft Products (141)
- Law Enforcement and Legal Action (49)
- News about Lavasoft (109)
- Phishing (1)
- Researcher Comments (39)
- Riff Raff (25)
- Rogues (76)
- Security Alert (93)
- Security Alerts (72)
- Security Tips (260)
- Website News (11)


